ULTIMATE GUIDE TO SEAT BELT TENSIONER SETUP: SEATS, COCKPITS AND HARNESSES
The QS-BT1 is a game-changing seat belt tensioner for sim racing and flight simulation enthusiasts. However, to unleash its full potential, you’ll need to ensure your setup is tailored for peak performance. From selecting the right racing seat, compatible cockpit and choosing the optimal harness, every detail matters. This comprehensive guide will help you navigate these considerations, making your sim racing or flight sim experience truly immersive.
What Seat Should You Choose for the QS-BT1 Seat Belt Tensioner?
Choosing the right seat for your QS-BT1 seat belt tensioner is critical for a seamless and immersive experience. Since the system relies on proper tension distribution, a standard car seat won’t suffice. A racing seat, specially designed for high-performance applications, is essential.
Key Features of a Suitable Racing Seat
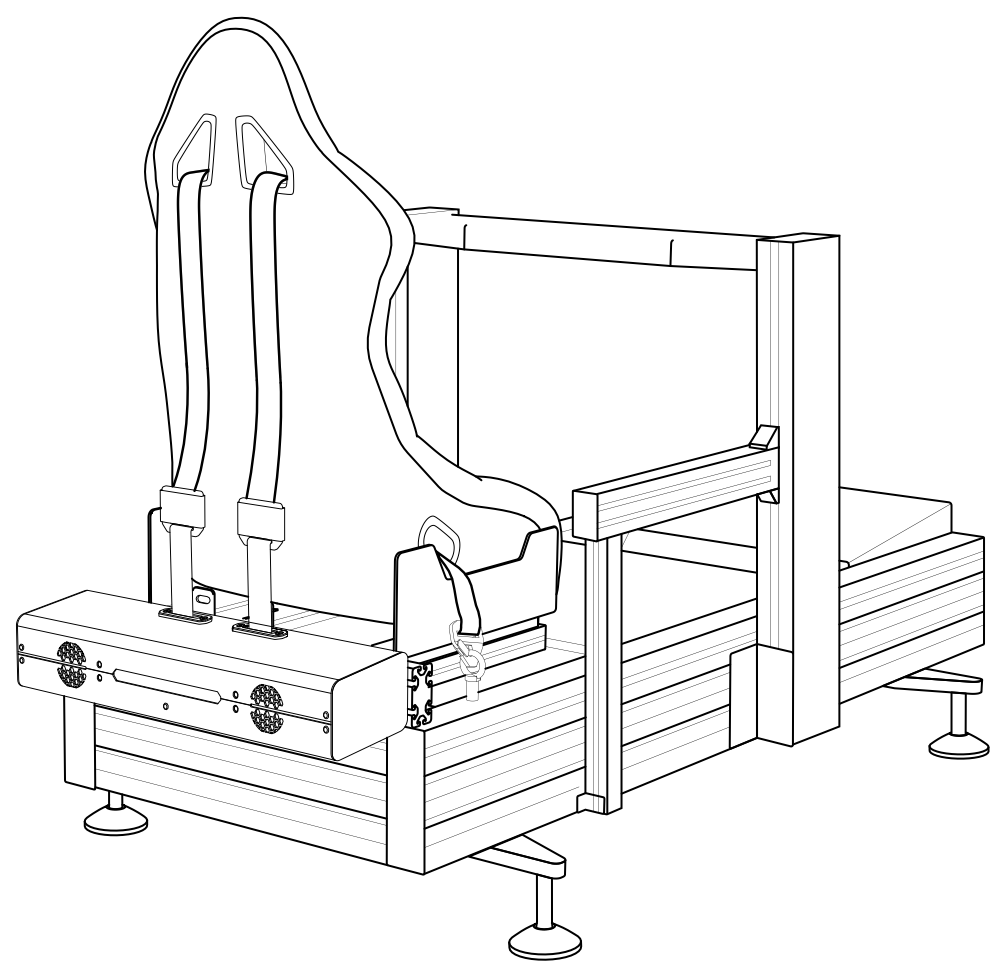
A racing seat should include back, side, and bottom harness slots to allow for a secure and accurate installation of the racing harness. These slots not only ensure the safety and comfort of the user but also help optimize the dynamics of the QS-BT1.
Back Harness Slots Alignment
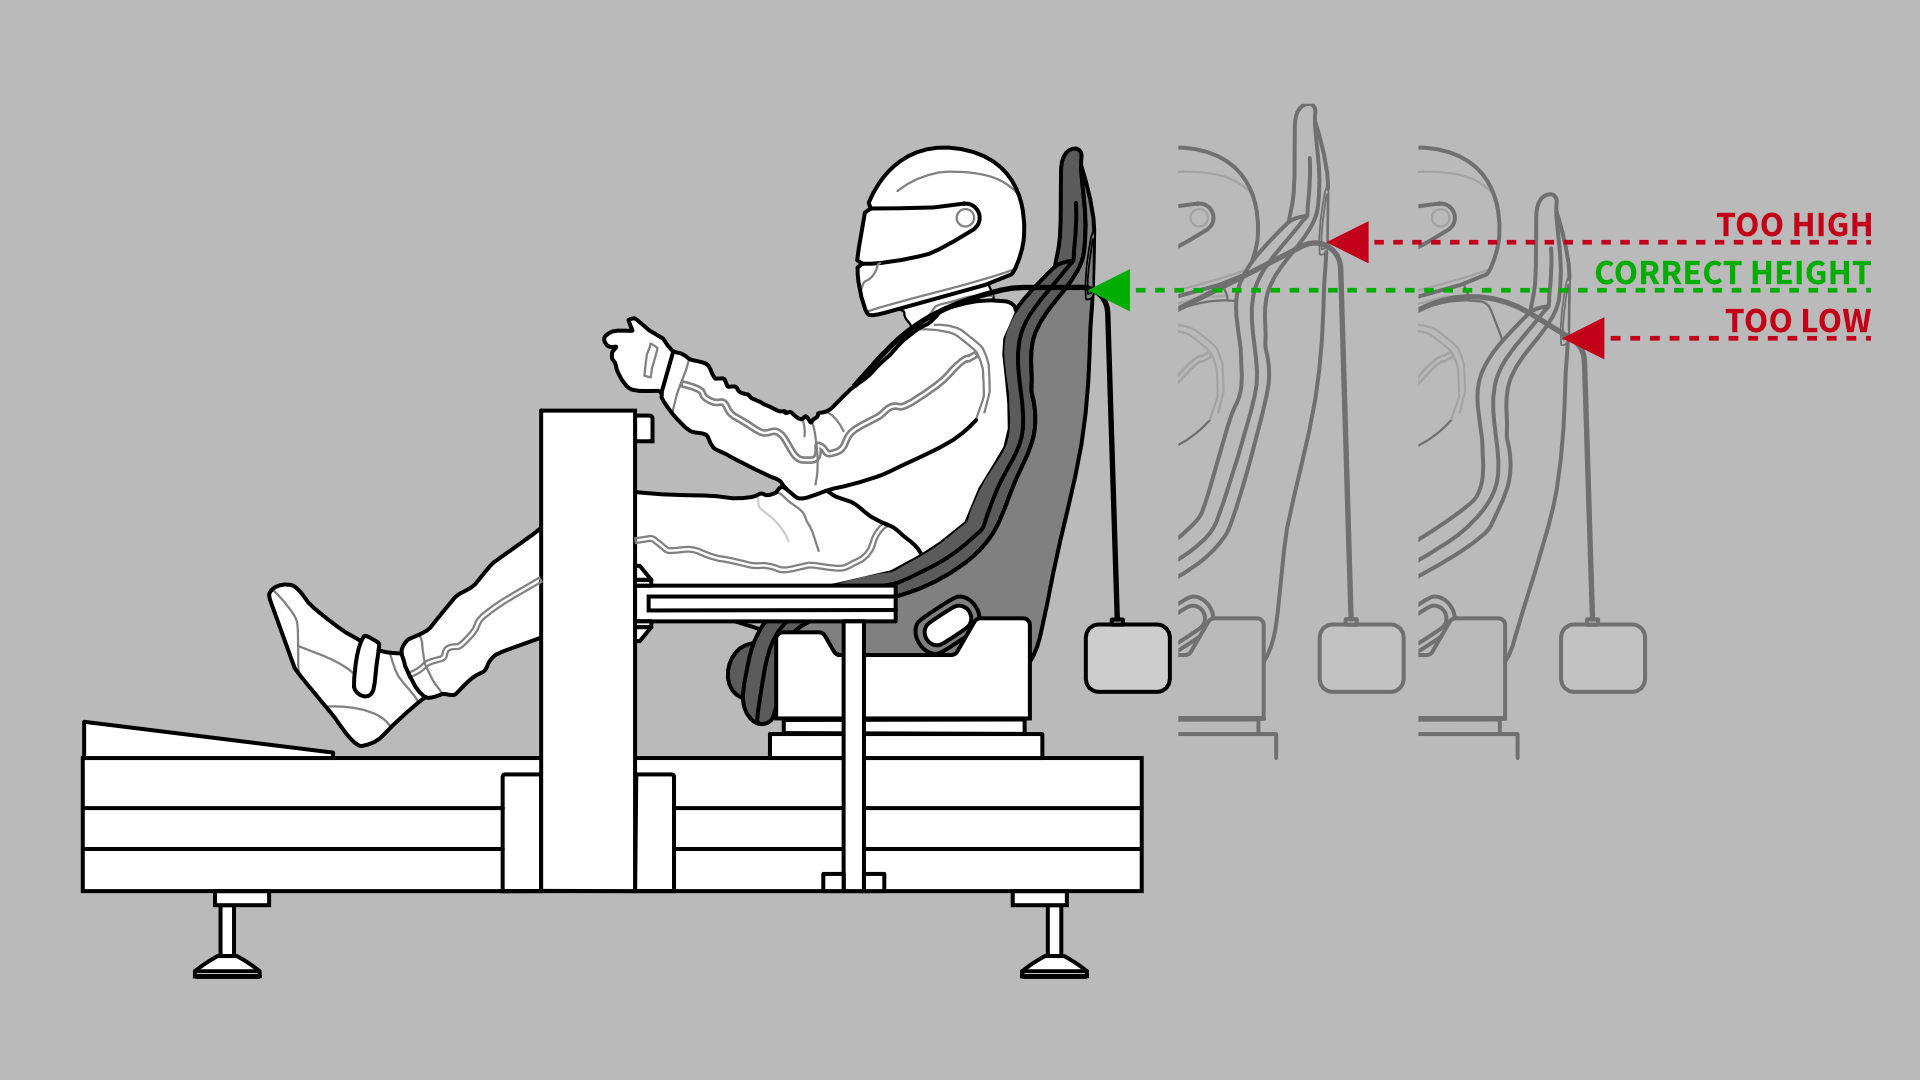
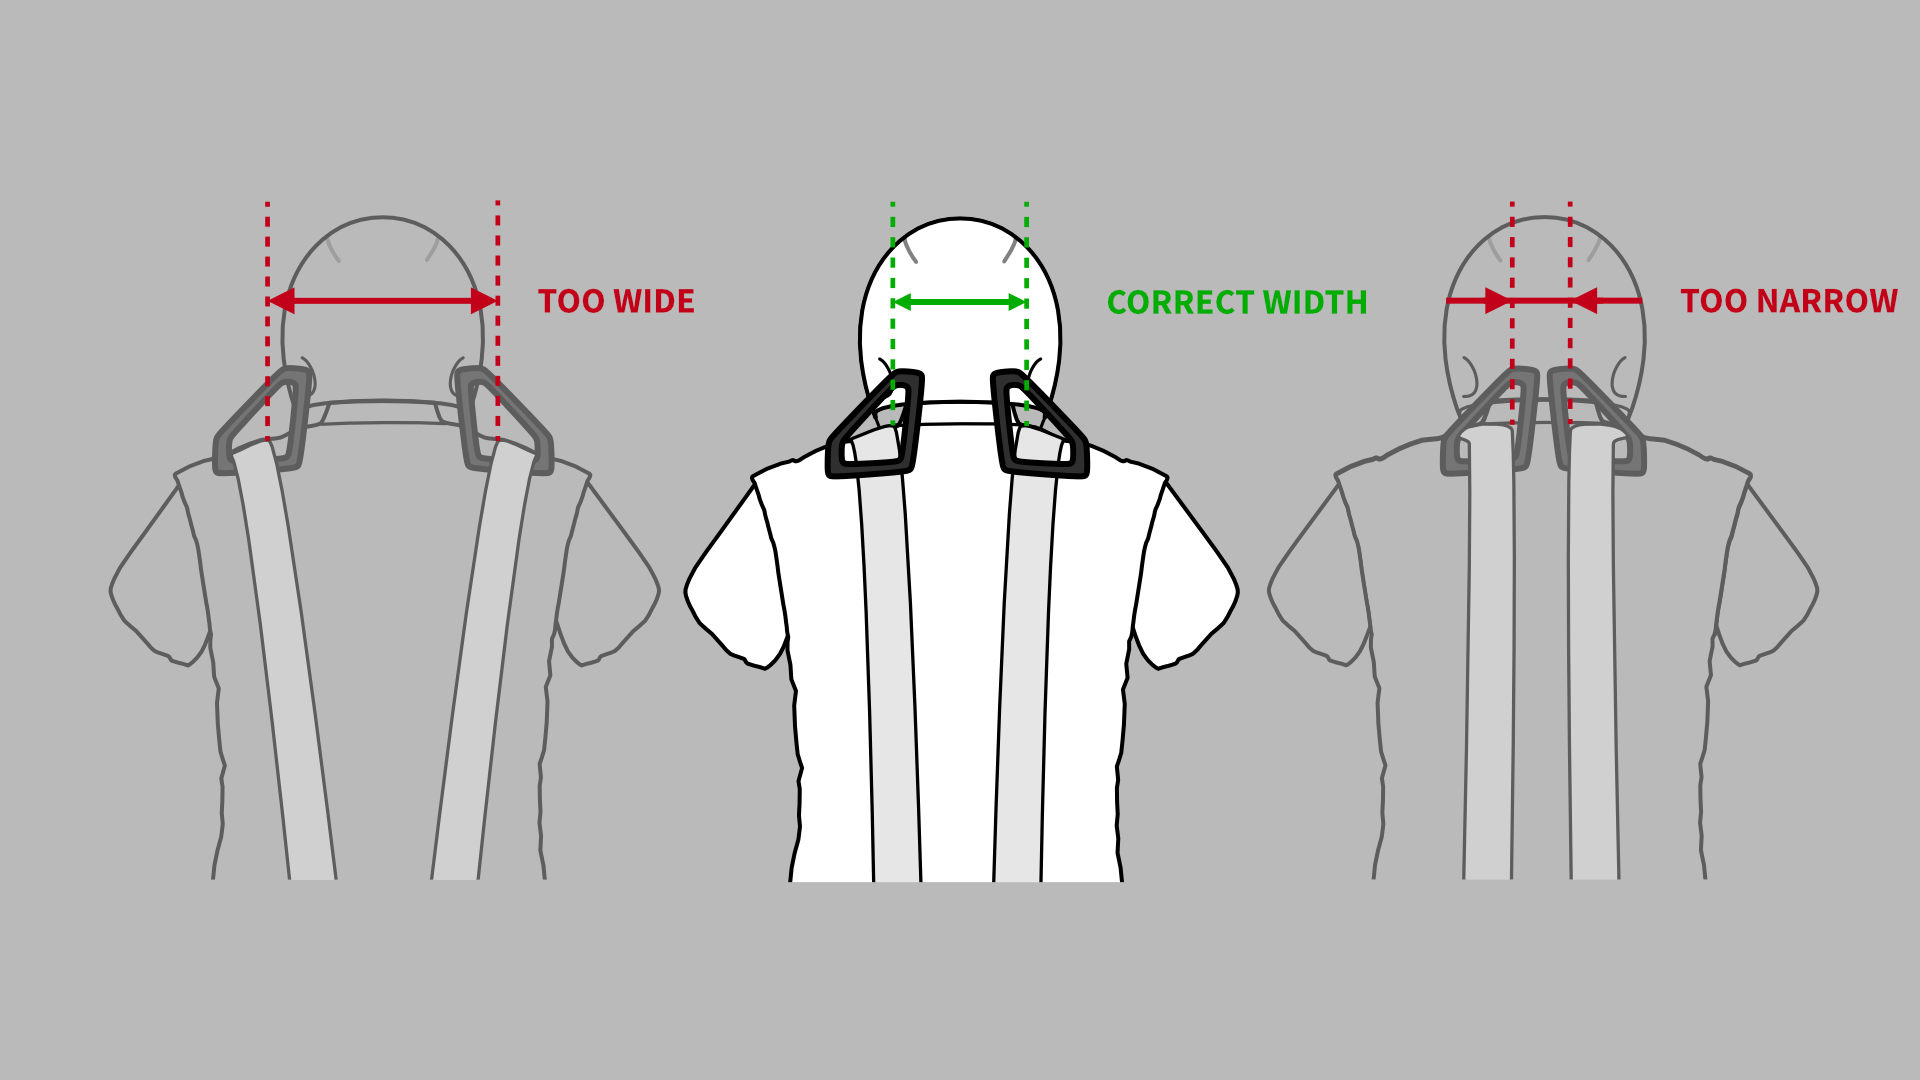
For sim racing, the back harness slots should align with your shoulders to provide a natural tensioning effect. However, in flight simulations, the slots should be slightly below the shoulder level to accommodate different tensioning needs. Improper alignment could lead to discomfort or reduced immersion.
The Importance of Low-Friction Seat Inserts
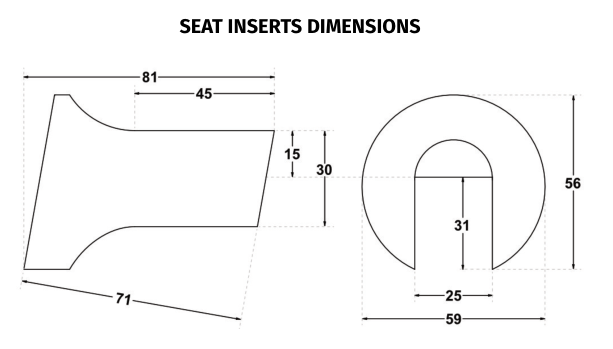
Low-friction seat inserts are invaluable for preserving your seat, harness, and the QS-BT1. They reduce wear and tear, minimize friction, and allow for smoother belt tensioning. This enhances immersion by making belt movements more dynamic, requiring less tension force and improving belt release.
Alternatives for Non-Compatible Seats
If your existing seat isn’t compatible with the included low-friction inserts, consider printing or fabricating your own slider using low-friction materials. Alternatively, you could use harness rollers (with a minimum diameter of 35 mm) to reduce the harness bend angle. For aluminum-profile cockpits, building a frame behind the seat for the harness to glide on is an effective solution.
What Sort of Cockpit Is Required to Mount the QS-BT1?
The compatibility of your cockpit plays a pivotal role in setting up the QS-BT1 seat belt tensioner. A well-built cockpit ensures stability and precision, enhancing the tensioner’s effectiveness and your overall immersion.
Optimal Cockpit Choice: Aluminum Profile-Based Designs
Aluminum profile based cockpits are the ideal foundation for mounting the QS-BT1. These cockpits provide excellent stiffness and adaptability, allowing you to easily attach the included universal adapter plates. If you’re using Qubic System platforms, additional adapter plates can be purchased separately for seamless integration.
Key Installation Guidelines
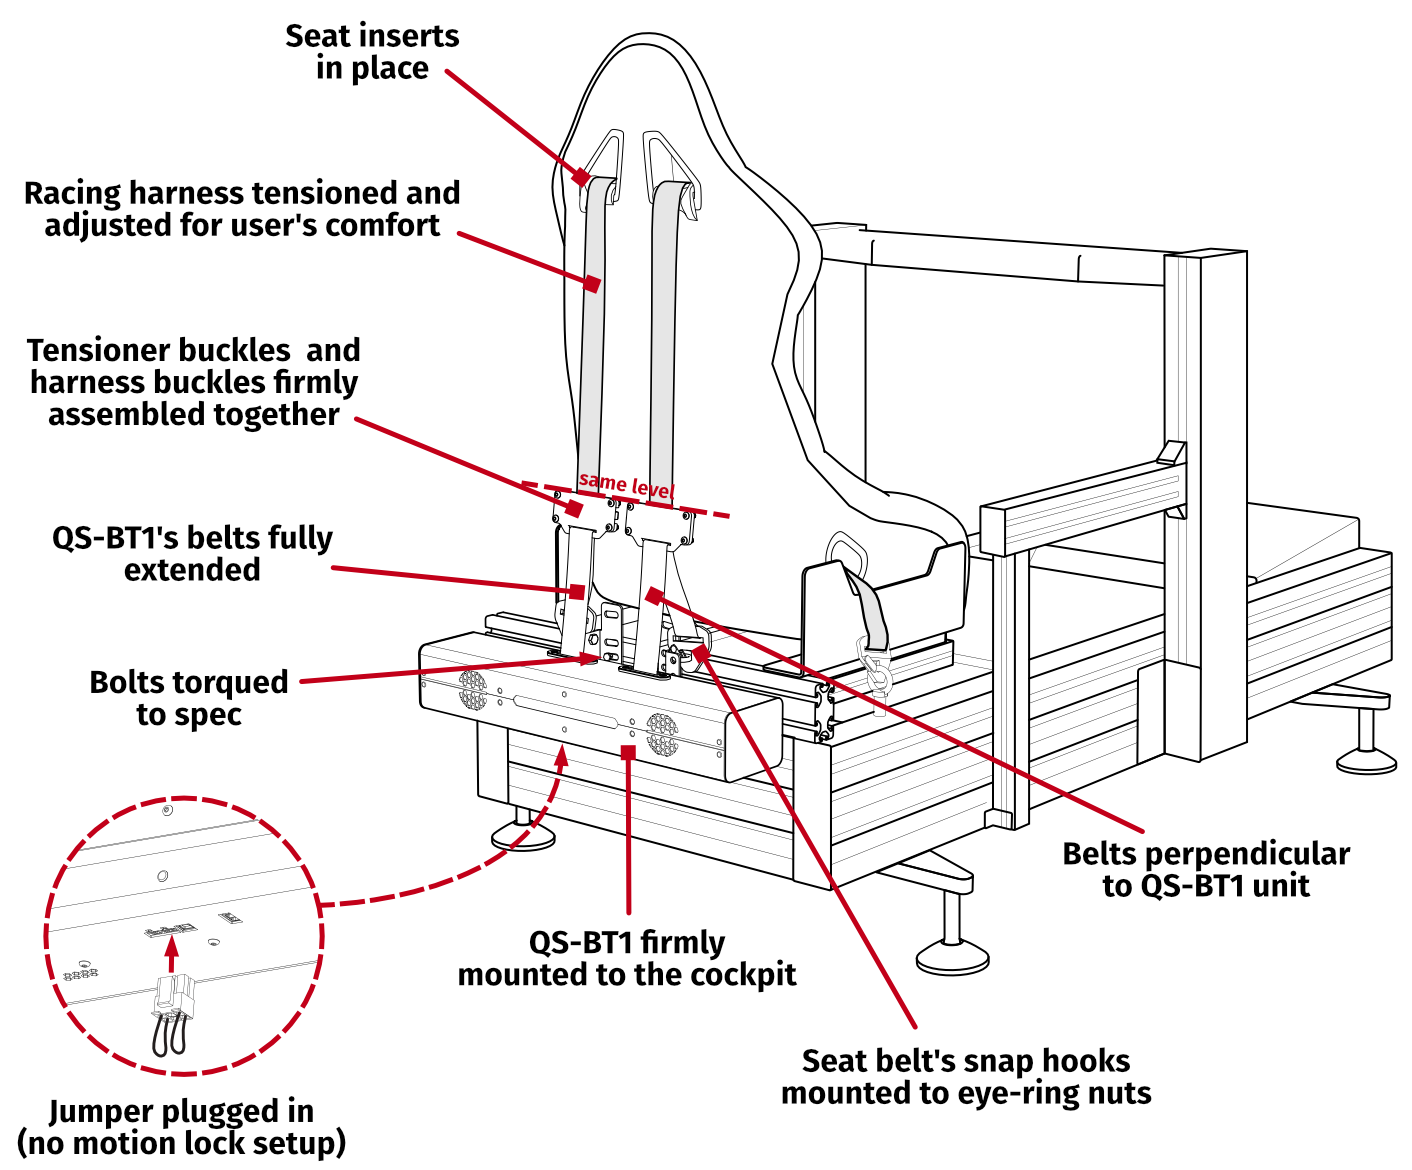
The QS-BT1 requires the belts to be mounted perpendicular to the tensioner and parallel to one another. For non-aluminum-profile cockpits, ensure this alignment is maintained to avoid operational issues.
Motion Platform Considerations
If your setup includes a motion platform, the QS-BT1 must be mounted to a section that moves in sync with the seat. This ensures that the tensioner and harness operate harmoniously, delivering consistent feedback and tensioning.
Adapting Non-Aluminum Profile Cockpits
For non-aluminum profile cockpits, you may need to fabricate a custom mounting plate. The simplest approach is to install a single 80×40 mm aluminum profile behind the seat, which can then accommodate the QS-BT1 using the included adapter plates. This provides a cost-effective yet sturdy mounting solution.
What Racing Harness Should You Use for the QS-BT1?
While the QS-BT1 provides the core tensioning mechanism, your choice of racing harness is just as critical. Without the right harness, you risk compromising both comfort and immersion.
Avoid 4-Point Harnesses
A 4-point racing harness is not recommended for use with the QS-BT1. The tensioning force often causes the harness to slide upward, leading to discomfort and breaking the sense of immersion. Instead, opt for a 5-point or 6-point harness, which provides better anchoring and stability.
Choosing between 5 or 6 point comes down to personal preference, racing seat type and the ability to anchor them to the cockpit.
Choosing Between 2-Inch and 3-Inch Harness Straps
Both 2-inch and 3-inch racing harnesses are compatible with the QS-BT1. While 3-inch straps offer superior pressure distribution, they may not suit everyone. For users with smaller body type, 3-inch straps can cause neck irritation. In such cases, padded shoulder straps or 2-inch harnesses provide a more comfortable alternative.
Essential Harness Features
To maximize comfort and performance, look for the following features in your racing harness:
- Quick Release Center Hub: For rapid and convenient harness adjustments.
- High-Quality Shoulder Adjusters: These ensure the harness can withstand the tension forces exerted by the QS-BT1.
- Snap Hooks for Easy Installation: Snap hooks simplify the process of attaching the harness to the cockpit, especially when used with eye-ring nuts.
FIA-Certified Harnesses for Reliability
For safety and durability, it’s recommended to use an FIA-certified racing harness. These harnesses are designed for high-stress applications, offering excellent stiffness, superior adjustment mechanisms, and long-lasting performance.
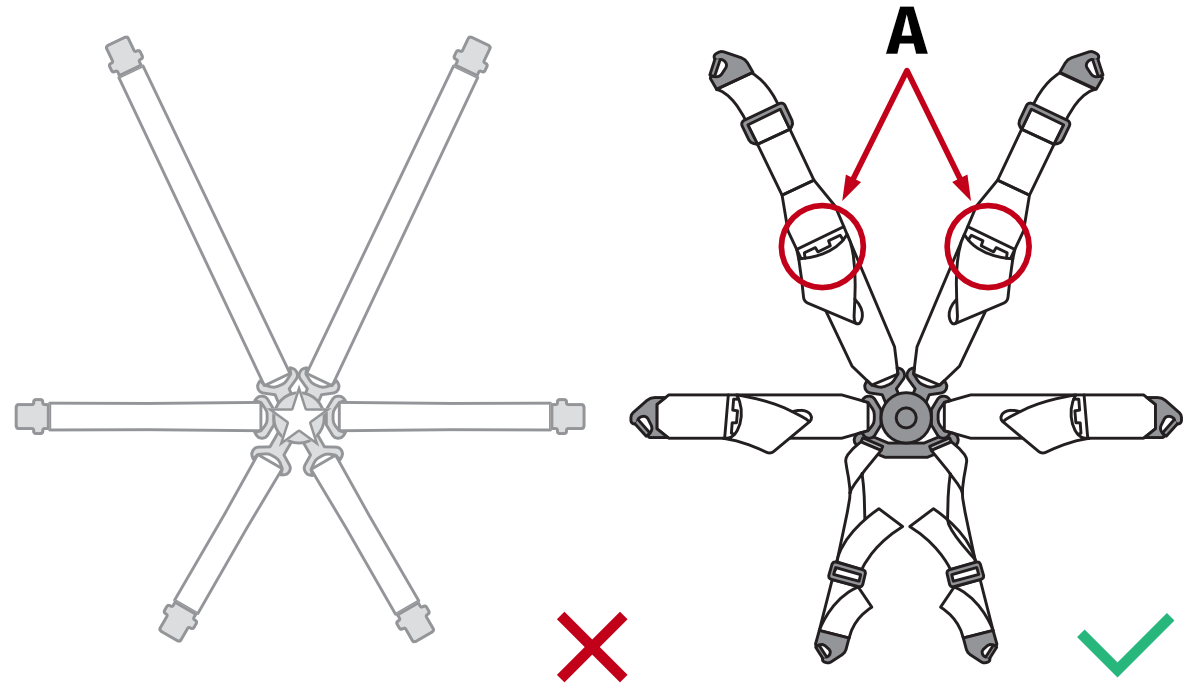
To ensure correct QS-BT1 assembly and belt adjustement, go through the checklist:
